Thursday, November 14, 2024

Building Wooden Bath Trays with Minimal Tools

Building Wooden Bath Trays with Minimal Tools

Building Wooden Bath Trays with Minimal Tools

Indulge in the luxury of a relaxing bath enhanced by a handcrafted wooden bath tray. This project, achievable with minimal tools, allows you to create a personalized sanctuary for your bathing rituals. From enjoying a book and a glass of wine to organizing your bath essentials, a wooden bath tray adds a touch of warmth and elegance to your bathroom.

Planning Your Wooden Bath Tray

Before embarking on the construction, careful planning is crucial. Consider these factors:

Size and Shape

The size and shape of the tray should be proportionate to your bathtub. A wider tray is ideal for accommodating multiple items, while a smaller tray is suitable for a single book or a glass of wine. Consider the length of your bathtub and the space available for the tray to rest comfortably on the rim. Experiment with different shapes like rectangular, oval, or even a unique design.

Materials

Choose wood that is water-resistant and durable. Cedar, teak, and redwood are excellent options. The thickness of the wood will determine the tray's sturdiness. A thicker board offers greater stability and can support heavier items. Seek out well-seasoned wood to minimize warping and cracking.

Features

Decide on the features you want to incorporate. Consider adding a lip around the edges to prevent items from sliding off. Include a built-in recess for a glass or a small candle holder. Cutouts for handles will provide a secure grip when carrying the tray. A small shelf underneath the tray can be useful for holding items like a loofah or soap.

Tools

You'll need a few basic tools:

  • Hand saw or circular saw
  • Measuring tape
  • Pencil
  • Sandpaper (various grits)
  • Wood glue
  • Clamps
  • Wood finish (optional)
  • Construction Steps

    Follow these steps to create your wooden bath tray:

    1. Cut the Wood

    Using your measuring tape and pencil, mark the dimensions of the tray on the wood. Ensure all angles are accurate and that the cuts will result in a rectangle or your desired shape. Use a handsaw or circular saw to cut the wood along the marked lines. Make sure your cuts are clean and straight.

    2. Create Features

    If you're incorporating features like a lip, handle cutouts, or a shelf, measure and mark these on the wood. Carefully use your saw to cut these features. Use a chisel or router for precise details.

    3. Sand the Edges

    Once the pieces are cut and features are created, sand the edges and surfaces of the wood. Begin with coarse-grit sandpaper to remove rough edges and then progress to finer grits for a smooth finish. Ensure all surfaces are smooth to prevent splinters.

    4. Assemble the Tray

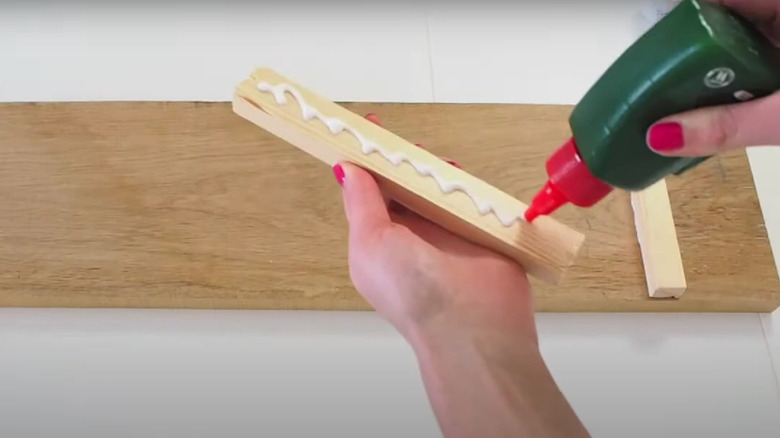
    Apply wood glue to the edges of the pieces that will form the tray. Securely clamp the pieces together, ensuring all joints are aligned and flush. Allow the glue to dry completely according to the manufacturer's instructions.

    5. Finish the Tray (Optional)

    To protect the wood and enhance its appearance, apply a wood finish. This could be a sealant, varnish, or oil. Apply the finish according to the product instructions, allowing each coat to dry completely before applying the next.

    Safety Precautions

    Always practice safety when using power tools. Wear safety glasses and ear protection, and use a sawhorse or workbench for support when cutting. Keep your hands away from the blade and handle tools with care. Before using wood glue, read and understand the manufacturer's instructions, and ensure proper ventilation.

    Customization Tips

    Personalize your bath tray by incorporating these ideas:

  • Incorporate a built-in wine glass holder by creating a small recess in the tray.
  • Add a small shelf underneath the tray to hold a loofah or soap.
  • Include a small candle holder for a relaxing ambiance.
  • Use decorative hardware for handles, adding a touch of elegance to the tray.
  • Apply a unique stain or paint to create a personalized look.
  • Add a decorative inlay or wood burning to create a personalized design.
  • Maintenance

    To maintain your wooden bath tray, avoid exposing it to prolonged periods of water. After each use, wipe down the tray with a damp cloth and allow it to air dry completely. Consider applying a protective sealant or oil periodically to enhance its longevity.

    Conclusion

    Creating a wooden bath tray is a rewarding project that allows you to personalize your bathing experience. With minimal tools and some creativity, you can craft a beautiful and functional piece that will transform your bathroom into a relaxing sanctuary. Enjoy the process and the luxurious addition to your bath time routine.

    How to Make Wooden Candle Holders with a Natural, Eco-Friendly Look

    How to Make Wooden Candle Holders with a Natural, Eco-Friendly Look

    Crafting Beautiful & Eco-Friendly Wooden Candle Holders

    Adding a touch of warmth and natural beauty to your home is easy with handmade wooden candle holders. Not only are they a stylish addition to any décor, but they also offer a sense of handcrafted charm and eco-friendliness. This project lets you tap into your creativity while minimizing your environmental impact. Let's dive into the steps to create stunning wooden candle holders that you'll love for years to come.

    Choosing the Right Wood

    The type of wood you choose will significantly influence the final look and feel of your candle holders. Consider factors like the grain pattern, color, and durability. Here are some options:

    • Driftwood: This weathered wood adds a unique, rustic aesthetic. Its natural imperfections and varying textures create a captivating visual interest.
    • Reclaimed Wood: Giving old wood a new purpose is both sustainable and stylish. Reclaimed wood often comes with character marks and variations that enhance the beauty of your candle holders.
    • Cedar: Known for its pleasant aroma, cedar wood is an excellent choice for candle holders. Its natural oils help repel insects and add a touch of fragrance to the air.
    • Pine: Softwood like pine is easy to work with and offers a light, natural color. Pine also has a lovely grain pattern that adds visual appeal.

    When selecting wood, make sure it's free of knots or cracks that could weaken the candle holder.

    Preparing the Wood

    Before you start crafting, it's essential to prepare the wood properly. This ensures a smooth and safe surface for your candle holders:

    • Sand the Wood: Use sandpaper to smooth out any rough edges and create a polished finish. Start with coarser grit sandpaper and gradually work your way to finer grits for a smoother surface.
    • Apply a Finish: A protective finish like natural oil, wax, or sealant enhances the wood's beauty and protects it from moisture and wear. Choose a finish that complements the wood's natural color and texture.

    Ensure the finish is completely dry before proceeding to the next step.

    Designing Your Candle Holders

    Now comes the fun part! There are countless possibilities for designing your wooden candle holders. Here are some inspiring ideas:

    • Simple and Minimalist: Cut the wood into squares, rectangles, or circles to create basic candle holders. These designs are perfect for showcasing the wood's natural beauty.
    • Rustic Charm: Use branches, twigs, or driftwood to create unique candle holders. Leave the natural imperfections intact for a rustic and organic feel.
    • Geometric Shapes: Experiment with geometric shapes like triangles, hexagons, or pentagons for a modern and contemporary look.
    • Layered Design: Stack different wood pieces to create layered candle holders. This creates visual interest and depth.

    Let your imagination run wild! Use tools like saws, drills, and chisels to cut, shape, and create intricate designs. Remember, the key is to personalize your candle holders to reflect your style.

    Adding a Finishing Touch

    Once your candle holders are designed and finished, you can add a few extra touches to enhance their beauty and functionality.

    • Decorative Elements: Incorporate natural elements like moss, leaves, or pinecones to add a touch of nature-inspired elegance.
    • Painted Accents: Use natural-toned paints or stains to add subtle color variations to your candle holders. Avoid using harsh or bright colors that could clash with the natural wood.
    • Textured Surfaces: Create textured surfaces on your candle holders by using a carving tool or sandpaper. This adds depth and visual interest.

    By adding these finishing touches, you can create one-of-a-kind wooden candle holders that are both visually stunning and environmentally friendly.

    Safety First

    Always prioritize safety when creating and using wooden candle holders:

    • Use Non-Flammable Materials: Make sure any materials you use are non-flammable, especially around the flame. Avoid using synthetic materials like fabrics or plastics.
    • Place Candles Securely: Ensure your candles are positioned securely on the candle holders to prevent them from tipping over. Use votive candle holders or tea lights for added stability.
    • Never Leave Candles Unattended: Always extinguish candles before leaving the room or going to bed. Avoid placing candles near flammable materials or in drafty areas.

    By taking these precautions, you can enjoy your handcrafted wooden candle holders safely and responsibly.

    Embrace the Eco-Friendly Journey

    Creating wooden candle holders is more than just a craft project; it's a mindful way to bring natural beauty into your home while reducing your environmental footprint. By choosing sustainable wood sources and using eco-friendly finishes, you can create beautiful and functional candle holders that you'll cherish for years to come.

    Remember, the process is just as important as the end result. Take your time, enjoy the journey, and celebrate the beauty of handcrafted creations. Happy crafting!

    Profitable Organizer Ideas for Small Tool Storage

    Profitable Organizer Ideas for Small Tool Storage

    A well-organized toolbox isn't just about aesthetics; it's a crucial investment in your productivity and efficiency. For small tool storage, clever solutions are key, and these ideas not only keep your tools accessible but also contribute to a profitable business.

    The Power of Categorization:

    The first step to conquering tool clutter is organization. By grouping tools by function or project, you can quickly locate the right tool for the job. Here's how to implement this effectively:

    Tool Trays and Dividers:

    Invest in tool trays or dividers for drawers. These create dedicated spaces for specific tool types, minimizing the "search and sift" routine. You can even label trays for easy identification.

    Hanging Storage:

    Wall-mounted organizers are a fantastic way to maximize vertical space. Use magnetic strips for smaller tools like screwdrivers and wrenches, and pegboards for larger items like hammers and saws. This keeps frequently used tools within easy reach.

    Maximize Every Inch:

    Don't underestimate the power of maximizing every square inch of space in your toolbox. Small tool storage often necessitates a creative approach:

    Stackable Containers:

    Utilize stackable containers to store smaller items like screws, nails, and fasteners. This maximizes vertical space and ensures these small, but essential tools stay organized.

    Rolling Carts:

    If you're short on floor space, rolling carts offer an excellent solution. These allow you to move tools and supplies easily around your workspace and can be easily stored away when not in use.

    Invest in Quality:

    Durable organizers are not just aesthetically pleasing; they contribute to a profitable business in the long run:

    Heavy-Duty Drawers:

    Opt for toolboxes or cabinets with heavy-duty drawers. These will withstand the wear and tear of constant use, keeping your tools secure and organized for years to come.

    Durable Materials:

    Select organizers made from sturdy materials like metal or high-quality plastics. These will resist damage and keep your tools protected from the elements.

    Beyond the Toolbox:

    Organizing small tool storage goes beyond your toolbox. Consider these strategies for a more comprehensive approach:

    Designated Workstations:

    Creating dedicated workstations for specific tasks can streamline your workflow and ensure tools are readily available. For example, you might have a dedicated station for electrical work, plumbing, or woodworking.

    Mobile Tool Belts:

    For mobile jobs, invest in a high-quality tool belt. This allows you to carry essential tools conveniently and avoid unnecessary trips back and forth to the toolbox.

    By implementing these organizer ideas for small tool storage, you can not only keep your tools in order but also contribute to a more efficient, productive, and ultimately, more profitable business.

    How to Sell Handmade Toolbox Organizers on Etsy

    How to Sell Handmade Toolbox Organizers on Etsy

    Ready to Turn Your Toolbox Organization Dreams into Etsy Gold?

    Listen, I get it. We all have those moments where we feel like our toolboxes are overflowing, a chaotic mess that makes even the simplest task feel impossible. But here’s the thing â€" a well-organized toolbox is a **game-changer**, and that's where your handmade toolbox organizers come in.

    Etsy is a fantastic platform to showcase your unique craftsmanship and turn your organizational creations into a thriving side hustle. I'm here to break down all the essential steps to turn your toolbox organizer dreams into Etsy success!

    Setting Up Your Etsy Shop: First Things First

    Before you start listing your gorgeous organizers, you'll need a solid foundation. Here's your checklist:

    Etsy Shop Basics: The Foundation

  • Open an Etsy Shop: Head to Etsy.com, click on "Sell on Etsy" and follow the simple instructions.
  • Choose a Shop Name: Be creative! Think about what reflects your style and target audience. "OrganizedChaosCrafts" or "ToolTimeTidy" â€" you get the idea.
  • Add a Shop Banner and Logo: Create a visually appealing banner that shows off your craftsmanship and sets the tone for your shop.
  • Set Up Payment Methods: Ensure you have PayPal and a credit card on file for easy transactions.
  • Crafting Killer Toolbox Organizers: Where the Magic Happens

    Here's where your creative genius takes center stage. Let's get those toolbox organizers crafted with love and precision.

    Find Your Niche: What Makes Your Organizers Stand Out?

  • Target Audience: Who are you crafting for? Are they professional contractors, DIY enthusiasts, or hobbyists? Knowing your audience helps you tailor your designs and materials.
  • Material Matters: Choose high-quality materials that are durable and easy to clean. Consider wood, metal, plastic, or even fabric organizers.
  • Unique Features: What makes your organizers special? Maybe they are custom-sized, have magnetic compartments, or offer built-in tool holders.
  • Crafting Tips: From Inspiration to Creation

  • Measure Twice, Cut Once: Accuracy is key! Take precise measurements of common tools to ensure a perfect fit.
  • Think About Functionality: Design your organizers with ease of use in mind. How will tools be accessed? How are they stored?
  • Test and Refine: Make a prototype and use it yourself! Get feedback from friends or family and make any necessary adjustments.
  • Picture-Perfect Listings: Show Off Your Masterpieces

    Now it's time to create those eye-catching Etsy listings that will make your toolbox organizers shine.

    Photography is Key: Let the Beauty Speak for Itself

  • High-Quality Images: Use natural lighting and a clean background to showcase your organizers in their best light.
  • Multiple Angles: Show the organizers from different angles â€" open, closed, and even in action.
  • Showcase the Details: Close-up shots of the materials, compartments, and any unique features will draw customers in.
  • Crafting Compelling Descriptions: Tell the Story

  • Catchy Titles: Make the title informative and intriguing. "Customizable Toolbox Organizer: Keep Your Tools in Order!"
  • Detailed Descriptions: Describe the materials, dimensions, features, and how the organizers will benefit the buyer.
  • Personalize Your Voice: Share your passion for crafting and the inspiration behind your designs.
  • Building Your Etsy Brand: More Than Just Organizers

    Creating a strong Etsy brand goes beyond just beautiful products. It's about building a consistent and recognizable identity.

    Embrace Your Style: Crafting a Look

  • Color Palette: Choose a cohesive color scheme that reflects your brand personality.
  • Consistent Imagery: Use similar lighting, backgrounds, and editing styles for all your photos.
  • Branding Elements: Incorporate a logo, font, and overall design aesthetic across your listings and shop pages.
  • Engage with Your Customers: Building Relationships

  • Promptly Respond to Messages: Answer questions and address concerns promptly.
  • Offer Excellent Customer Service: Go the extra mile to ensure your customers are happy with their purchase.
  • Social Media: Create a presence on platforms like Instagram or Pinterest to showcase your work and interact with potential buyers.
  • Get Those Sales Rolling: Mastering Etsy Marketing

    With your shop set up, stunning listings, and a strong brand, it's time to attract customers and get those sales flowing!

    Etsy SEO: Getting Found in the Crowd

  • Relevant Keywords: Use words and phrases people are likely to search for when looking for toolbox organizers (e.g., "toolbox organizer," "wood toolbox organizer," "customizable toolbox organizer").
  • Optimize Your Titles and Descriptions: Incorporate keywords naturally throughout your titles and descriptions.
  • Tag Strategically: Use relevant tags to help buyers find your listings.
  • Harnessing Etsy's Marketing Tools: Promote Your Products

  • Etsy Ads: Run targeted ads to reach a wider audience based on interests and demographics.
  • Etsy Promoted Listings: Boost your listings to get them higher visibility in search results.
  • Shop Updates: Share news about new products, sales, or special offers to keep customers engaged.
  • Remember, selling handmade toolbox organizers on Etsy is a journey â€" a journey filled with creativity, dedication, and the joy of seeing your passion turn into a successful business.

    So, get out there, craft those beautiful organizers, and let the world know you're the go-to person for all things toolbox tidy!

    Wooden Wall Shelves for Small Apartments That Are Easy to Sell

    Wooden Wall Shelves for Small Apartments That Are Easy to Sell

    Wooden Wall Shelves for Small Apartments That Are Easy to Sell

    In the ever-evolving landscape of real estate, maximizing space and enhancing functionality within small apartments is a constant endeavor. Wooden wall shelves have emerged as a highly sought-after solution, seamlessly blending aesthetic appeal with practical storage solutions. This article delves into the reasons why these shelves are readily embraced by potential buyers, shedding light on their marketability and the key features that make them a desirable addition to any compact dwelling.

    The Allure of Wooden Wall Shelves

    The appeal of wooden wall shelves in small apartments lies in their versatility, space-saving properties, and inherent charm. These shelves offer a unique blend of functionality and aesthetics, making them a winning proposition for both renters and buyers. Let's explore the specific attributes that make wooden wall shelves a hot commodity in the real estate market:

    Maximizing Space: A Crucial Factor

    In the limited square footage of a small apartment, every inch counts. Wooden wall shelves cleverly address this constraint by capitalizing on vertical space, eliminating the need for bulky floor-standing cabinets or bookshelves. This maximizes floor space, creating a more open and airy ambiance.

    Visual Appeal and Warmth

    Wood's natural beauty and warmth create a welcoming and inviting atmosphere, instantly enhancing the overall aesthetic of a small apartment. Unlike cold, metallic shelves, wooden shelves infuse the space with a touch of sophistication and coziness, making the apartment feel more inviting and homey.

    Versatility and Adaptability

    Wooden wall shelves cater to diverse storage needs, accommodating a wide array of items, from books and decorative accents to kitchenware and toiletries. Their modular design allows for easy customization, enabling residents to tailor the shelf configuration to their specific requirements.

    Key Features that Enhance Marketability

    Beyond their inherent appeal, certain features further elevate the marketability of wooden wall shelves in small apartments:

    Durable Construction

    Investing in well-crafted, sturdy wooden shelves is crucial. Solid wood or high-quality engineered wood ensures long-lasting durability, making them a reliable investment that can withstand the test of time.

    Sleek and Minimalist Design

    A minimalist design with clean lines and a streamlined silhouette enhances the spacious feel of a small apartment. Avoid overly ornate or bulky shelves, opting instead for a simple, contemporary aesthetic that complements the overall decor.

    Customizable Finishes

    Offering a choice of wood stains and finishes allows potential buyers to personalize the shelves to match their existing décor. Popular choices include natural wood tones, whitewashed finishes, and dark walnut stains.

    Easy Installation

    Simple installation procedures make wooden wall shelves a breeze to mount. Consider shelves with pre-drilled holes and clear instructions, ensuring a hassle-free installation process.

    Boosting the Selling Potential of Your Apartment

    Wooden wall shelves can be a game-changer when it comes to staging your small apartment for sale. Here's how to maximize their impact:

    Strategic Placement

    Position shelves strategically to highlight the available space and create a sense of openness. For instance, installing shelves above a sofa or bed provides a visual focal point while maximizing storage.

    Curated Display

    Showcase the versatility of the shelves by displaying a curated selection of items, such as books, plants, decorative objects, and artwork. This creates a visually appealing and organized look, emphasizing the shelves' storage capabilities.

    Highlighting the Benefits

    In your listing description and during viewings, emphasize the space-saving benefits of wooden wall shelves, highlighting their impact on maximizing floor area and creating a more open and inviting atmosphere.

    Conclusion

    Wooden wall shelves are a winning investment for small apartments, offering a seamless blend of practicality and aesthetics. Their ability to maximize space, enhance visual appeal, and adapt to diverse storage needs makes them a highly desirable feature that can significantly boost the marketability of your property. By choosing well-crafted, stylish shelves and strategically showcasing their benefits, you can increase the desirability of your apartment and attract a wider pool of potential buyers.

    Best Selling Woodworking Projects for New Woodworkers

    Best Selling Woodworking Projects for New Woodworkers

    Best Selling Woodworking Projects for New Woodworkers

    You're ready to dive into the world of woodworking! Maybe you've been taking in those YouTube videos for months now, scrolling through Pinterest boards for inspiration, or perhaps you've just been itching to create something with your own two hands. Whatever the reason, you're ready to get started. But with so many projects out there, it can be overwhelming to choose the right one for your first foray into woodworking. That's where I come in.

    I'm going to give you the inside scoop on some of the best-selling woodworking projects for beginners. These projects have been tried and tested by countless woodworkers and are known for being beginner-friendly, achievable, and even rewarding. So, grab your tools, put on your safety glasses, and let's get crafting!

    The Classics: Projects that Never Go Out of Style

    These projects are like the Beatles of woodworking - they're timeless, loved by all, and have stood the test of time. They're a great starting point for any beginner and give you a foundation in fundamental woodworking techniques.

    Simple Shelves

    Think about it - everyone needs shelves! They're perfect for organizing, displaying your favorite knick-knacks, or holding your growing collection of woodworking tools. A simple shelf project can be as straightforward as a few boards and brackets, or you can get fancy with custom designs and finishes. This project is a great way to practice your measuring, cutting, and attaching skills.

    Wooden Cutting Board

    A wooden cutting board isn't just practical, it's a statement piece in your kitchen. Plus, you can personalize it with different wood types and finishes. A cutting board is a fantastic way to practice your sanding and finishing techniques, and it's a project that's sure to be a hit with friends and family.

    Birdhouse

    Birdhouses are a classic woodworking project that's both functional and fun. You can design it to your liking, using different wood types and finishes, and personalize it with details like a roof or a little birdhouse door. This is a great way to practice your joinery skills and learn about working with smaller pieces of wood.

    Projects for the Home

    Who doesn't love making their home a little more cozy? These projects are perfect for adding a personal touch and a sense of accomplishment to your living space.

    Rustic Wooden Coat Rack

    A simple yet functional coat rack can be a great addition to your entryway or mudroom. You can use reclaimed wood for a rustic look or go for a sleek modern style. A coat rack is a good way to practice your woodworking basics and get comfortable using a drill and screws.

    Decorative Wooden Boxes

    Wooden boxes are versatile. You can use them for jewelry, trinkets, or even to organize your sewing supplies. You can choose a simple box design or get creative with different shapes and sizes. This project is a great way to practice your joinery techniques and learn about different wood types and finishes.

    Wooden Wall Clock

    A handmade wooden clock can be a unique and personalized addition to your home décor. You can use different wood types for the clock face and frame, and even personalize it with your own design. This project is a great way to learn about working with different materials and using a drill press.

    The Functional and Stylish

    These projects are not just pretty, they're also practical and designed to improve your daily life.

    Wooden Serving Tray

    A wooden serving tray is perfect for entertaining or for adding a touch of elegance to your daily routine. You can create a simple tray or experiment with different shapes and sizes. This project is a great way to practice your cutting, sanding, and finishing techniques, and it's a project that's sure to get lots of use.

    Wooden Tool Caddy

    A wooden tool caddy is a must-have for any woodworker. It's a great way to keep your tools organized and accessible. You can design it with different compartments and slots to fit your specific tools. This project is a great way to practice your woodworking basics and learn about different joinery techniques.

    Wooden Plant Stand

    A wooden plant stand can add a touch of nature to your home and elevate your favorite plants. You can create a simple stand or get creative with different shapes and designs. This project is a great way to practice your woodworking basics and learn about different finishes.

    Extra Tips for New Woodworkers

    You've chosen your project, your tools are ready, and you're raring to go! Here are a few tips to make your woodworking journey even smoother.

    • Start small: Don't bite off more than you can chew! Choose a simple project to start with and build your confidence.
    • Choose the right wood: Not all wood is created equal! Different wood types have different qualities, so choose one that's suitable for your project.
    • Get organized: Before you start, gather your materials, tools, and work area. A clean and organized workspace will make your woodworking experience more enjoyable and productive.
    • Safety first: Wear safety glasses, ear protection, and a dust mask. Take your time and double-check your measurements before making any cuts.
    • Don't be afraid to ask for help: If you're stuck, there are plenty of resources available online, at your local woodworking store, or even from a more experienced woodworker.
    • Have fun! Woodworking is a hobby that's both rewarding and relaxing. Enjoy the process and don't be afraid to experiment.

    Remember, everyone starts somewhere. Don't let perfection be your enemy, embrace the journey, and get ready for a world of woodworking possibilities!

    Profitable Coffee Table Projects to Make and Sell

    Profitable Coffee Table Projects to Make and Sell

    Profitable Coffee Table Projects to Make and Sell

    In the realm of woodworking and crafts, coffee tables offer a lucrative opportunity for artisans to showcase their skills and creativity. These versatile pieces of furniture are highly sought after for their functionality and aesthetic appeal, making them a desirable item for both personal and commercial markets. This article explores a range of profitable coffee table projects that can be made and sold, offering insights into design trends, materials, and marketing strategies for success.

    Design Trends in Coffee Tables

    Staying abreast of current design trends is crucial for crafting coffee tables that resonate with potential buyers. Here are some noteworthy trends:

    Minimalism and Simplicity

    Minimalist designs featuring clean lines, sleek silhouettes, and a focus on functionality continue to dominate the coffee table market. These tables often incorporate natural materials like wood and metal, emphasizing a sense of serenity and sophistication.

    Industrial Chic

    Industrial-inspired coffee tables, characterized by exposed metal accents, reclaimed wood, and a rugged aesthetic, have gained popularity among those seeking an urban and edgy vibe. These tables often feature distressed finishes and bold geometric shapes.

    Mid-Century Modern

    The mid-century modern style, known for its organic shapes, tapered legs, and warm wood tones, remains a timeless favorite. Coffee tables in this style often incorporate materials like walnut, teak, and leather, creating a sense of classic elegance.

    Rustic Charm

    Rustic coffee tables, with their natural imperfections and distressed surfaces, evoke a sense of warmth and comfort. These tables often utilize reclaimed wood, barn wood, or other rustic materials, highlighting the beauty of nature.

    Profitable Coffee Table Projects

    Here are some specific coffee table projects that offer high profit potential:

    Epoxy Resin Coffee Tables

    Epoxy resin coffee tables are a popular choice for their unique and visually stunning designs. The resin allows for creative embedding of objects like shells, flowers, or even old coins, creating a one-of-a-kind piece. The process involves pouring resin over a base of wood or other materials, resulting in a durable and waterproof surface.

    Live Edge Coffee Tables

    Live edge coffee tables showcase the natural beauty of wood, with the bark or edge of the tree left intact. The irregular shape adds character and uniqueness to these tables, making them highly sought after. The process involves carefully selecting and preparing live edge wood, often using a durable finish to protect the natural surface.

    Reclaimed Wood Coffee Tables

    Reclaimed wood coffee tables are environmentally friendly and offer a unique and rustic aesthetic. The wood can be sourced from old barns, salvaged furniture, or other sources, adding a story to each piece. These tables can be constructed in various styles, from simple and rustic to more elaborate designs.

    Metal and Wood Coffee Tables

    Metal and wood coffee tables offer a contemporary and sophisticated look. They often feature a combination of steel or iron frames with wood tops, creating a visually interesting contrast. Metal elements can be painted or left in their natural state, adding to the overall aesthetic.

    DIY Pallet Coffee Tables

    DIY pallet coffee tables are a cost-effective option for both makers and buyers. Pallet wood can be easily obtained and repurposed into a variety of coffee table styles. The rustic charm of pallet wood makes these tables a popular choice for both modern and farmhouse settings.

    Materials and Tools

    The choice of materials and tools will depend on the specific coffee table project you choose. Here are some common materials and tools used in coffee table making:

    Wood

  • Hardwoods: Oak, maple, cherry, walnut, and mahogany are durable and beautiful hardwoods commonly used for coffee tables.
  • Softwoods: Pine, cedar, and fir are less expensive and more easily worked, making them suitable for certain coffee table projects.
  • Reclaimed wood: Salvaged wood from barns, furniture, or other sources offers a unique and rustic aesthetic.
  • Plywood: Plywood is a cost-effective and versatile material for coffee table tops and bases.
  • Metal

  • Steel: Steel is strong, durable, and available in various finishes, making it suitable for coffee table frames and accents.
  • Iron: Iron offers a more rustic and industrial look, commonly used for coffee table legs, brackets, and other accents.
  • Aluminum: Aluminum is lightweight and corrosion-resistant, making it suitable for coffee table legs and supports.
  • Tools

  • Saw: A table saw, circular saw, or jigsaw is essential for cutting wood to size.
  • Drill: A drill with various bits is needed for drilling holes for screws, dowels, and other fasteners.
  • Screwdriver: A screwdriver is necessary for assembling coffee table components.
  • Sandpaper: Sandpaper is used to smooth out surfaces and prepare them for finishing.
  • Clamps: Clamps are essential for holding pieces together during assembly and glue-up.
  • Measuring tape: A measuring tape is crucial for accurate cutting and assembly.
  • Marketing and Sales

    Once you have crafted your coffee tables, it's essential to effectively market and sell them to generate revenue. Here are some strategies to consider:

    Online Platforms

  • Etsy: A popular online marketplace for handcrafted goods, Etsy allows you to reach a wide audience of potential buyers.
  • Shopify: A platform for building your own online store, Shopify offers greater control over branding and marketing.
  • Social Media: Utilize platforms like Instagram, Facebook, and Pinterest to showcase your coffee tables and connect with potential customers.
  • Local Markets and Craft Fairs

    Attending local craft fairs, farmers markets, and other events allows you to interact directly with potential buyers and showcase your work firsthand.

    Consignment Shops

    Consignment shops offer a way to sell your coffee tables on a commission basis, with the shop handling sales and customer interactions.

    Wholesale Partners

    Partnering with furniture stores, interior design firms, or other businesses that sell home décor can help you reach a larger audience and sell your coffee tables at a wholesale rate.

    Tips for Success

    Here are some tips for maximizing your success in making and selling profitable coffee tables:

    High-Quality Materials

    Invest in high-quality materials to ensure durability and a beautiful finish. This will translate into higher prices and customer satisfaction.

    Unique Designs

    Offer unique and original designs that differentiate your coffee tables from competitors. This will help you attract attention and stand out in a crowded market.

    Exceptional Craftsmanship

    Pay attention to detail and strive for excellence in every aspect of your craftsmanship. This will enhance the value and appeal of your coffee tables.

    Clear Product Photography

    Use professional-quality photography to showcase your coffee tables in their best light. This is essential for online marketing and attracting customers.

    Competitive Pricing

    Research your competition and price your coffee tables competitively while factoring in your material costs, labor, and desired profit margin.

    Excellent Customer Service

    Provide excellent customer service to foster loyalty and positive word-of-mouth referrals. This is crucial for building a successful business.

    In conclusion, making and selling coffee tables presents an exciting and profitable opportunity for woodworkers and craftspeople. By embracing current design trends, utilizing high-quality materials, and implementing effective marketing strategies, you can create a thriving business that showcases your skills and passion. Remember to prioritize quality, innovation, and exceptional customer service to achieve lasting success in this rewarding industry.